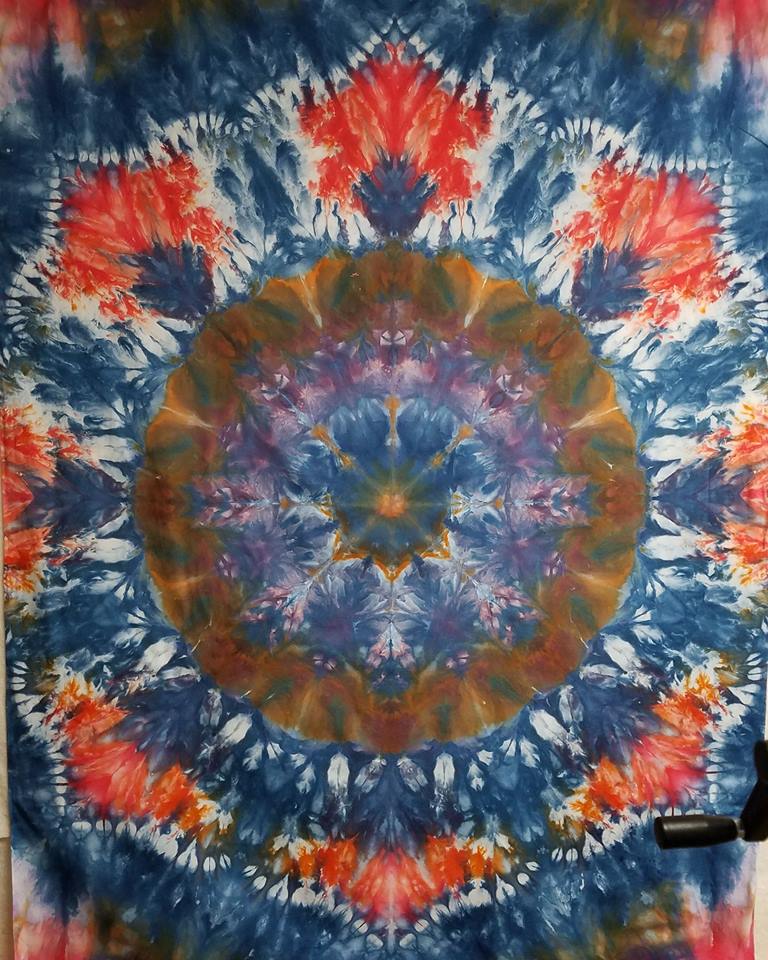
So I dyed this mandala a few months ago, and I wasn’t very happy with the result. Too much brown. I decided to add black over the brown to fix all of my problems, ha ha. This post is about how I dye with black. This can be done before you rinse your ice dyed mandala, or it can be done months later, when you decide to fix your problem. Here is the original dye. Too much brown for me!
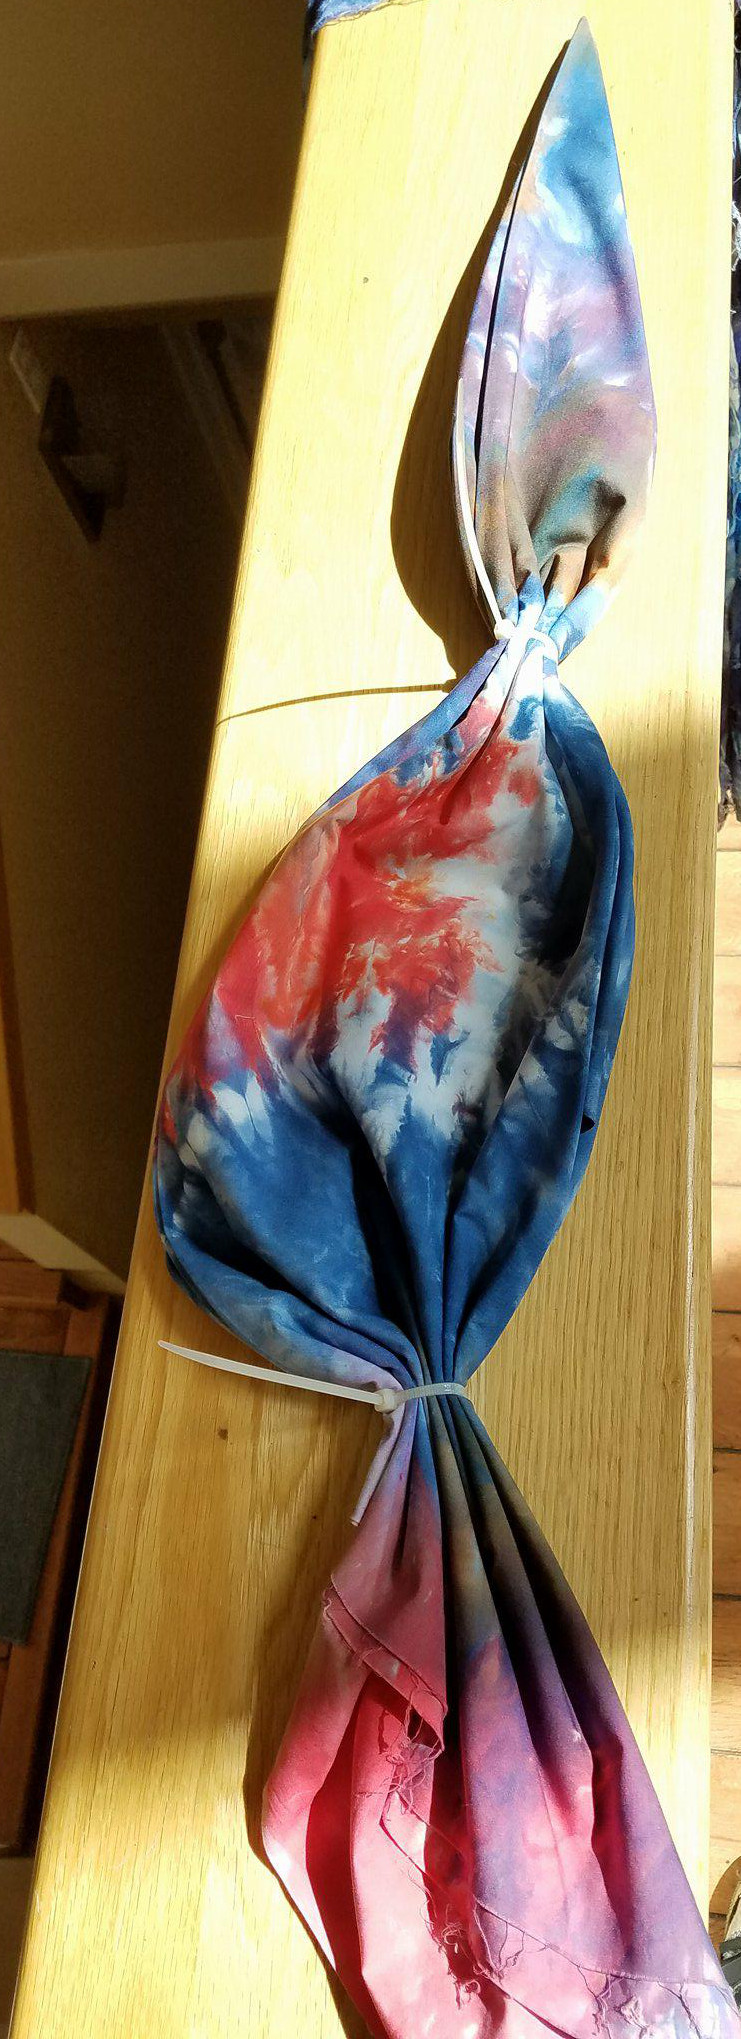
To dye it, and keep it looking like a Mandala, I first refolded along the original fold lines. That was fairly easy to do as I could clearly see the lines in the pattern. I did some accordian-style folding and zip tying to give more dimension to the dye. Unlike ice dyeing, dyeing with black (I think of it as “normal” dyeing) generally gives you one dimension of color – a flat, uniform black. Here is what my folded and zip tied mandala looked like:
Since this fabric had already been rinsed, washed and dryed, I needed to soak it in fixer (soda ash + water). I get my dyeing supplies from Dharma Trading Company. I use 1 cup of soda ash to 1 gallon of water. I let it soak for 5 or so minutes.
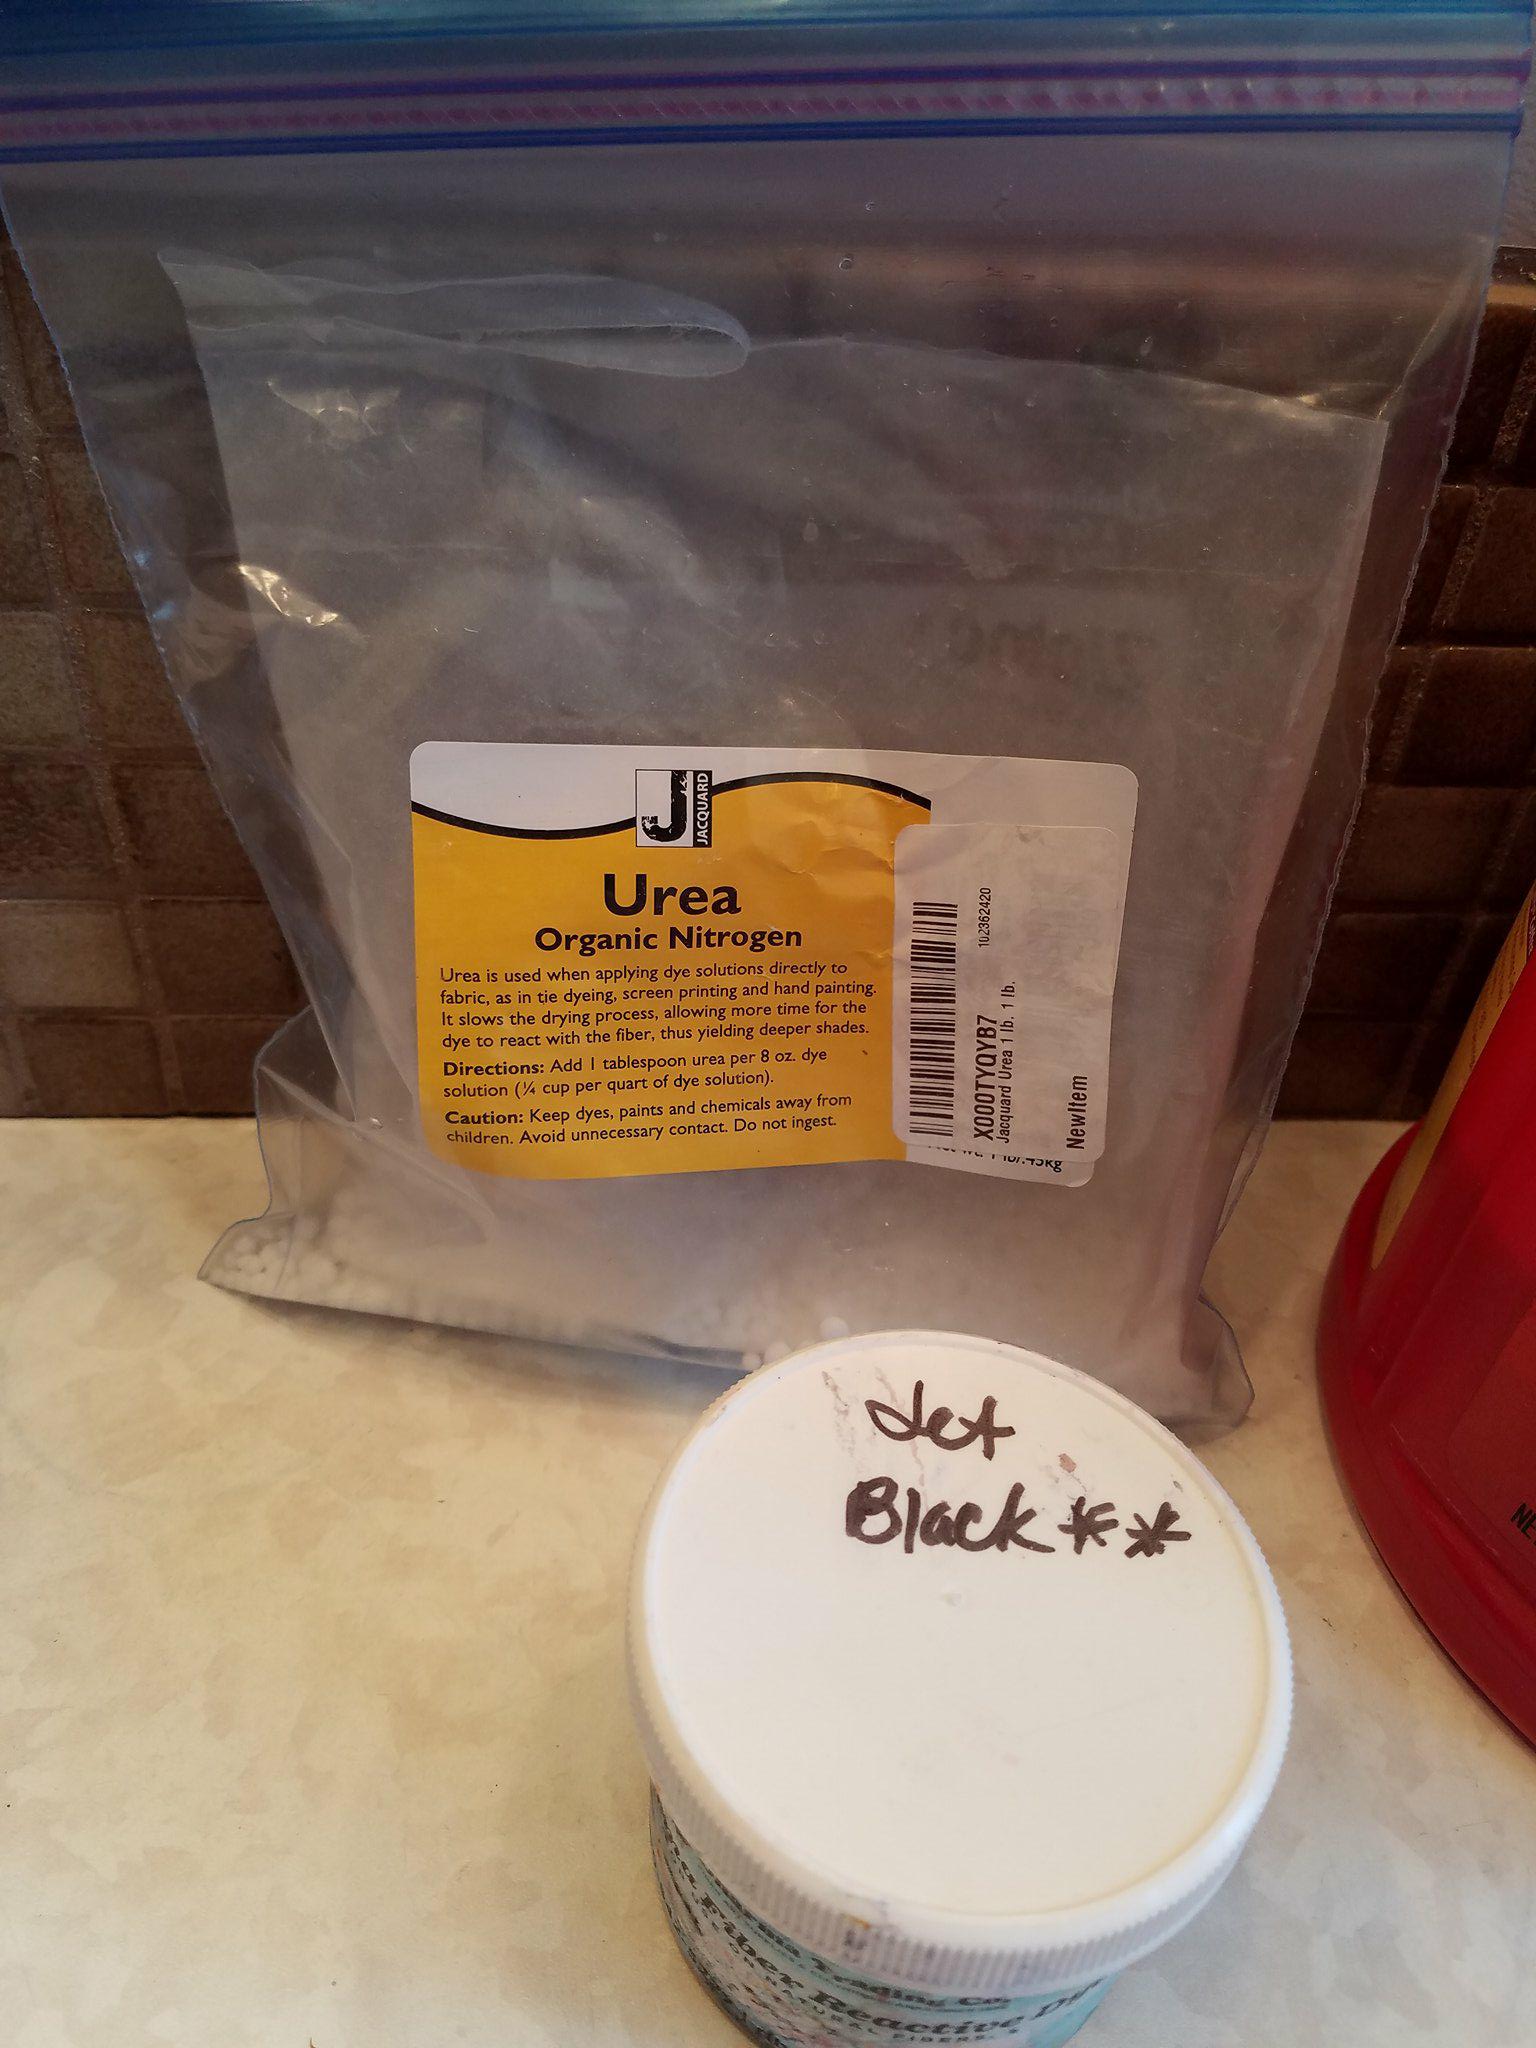
As the fabric was soaking, I mixed up some black dye. I used Jet Black (from Dharma). I wanted approximately a cup of dye. I dissolved 1 TBSP of urea (also from Dharma) in 1 cup of warm water first. The urea helps dissolve the dry dye into the water. Without that, black dye takes time and patience stirring to get well mixed. After dissolving the urea into the water, I stirred in 4 tsp of dry dye. Black dye generally requires a higher dry dye to water ratio that most dyes.
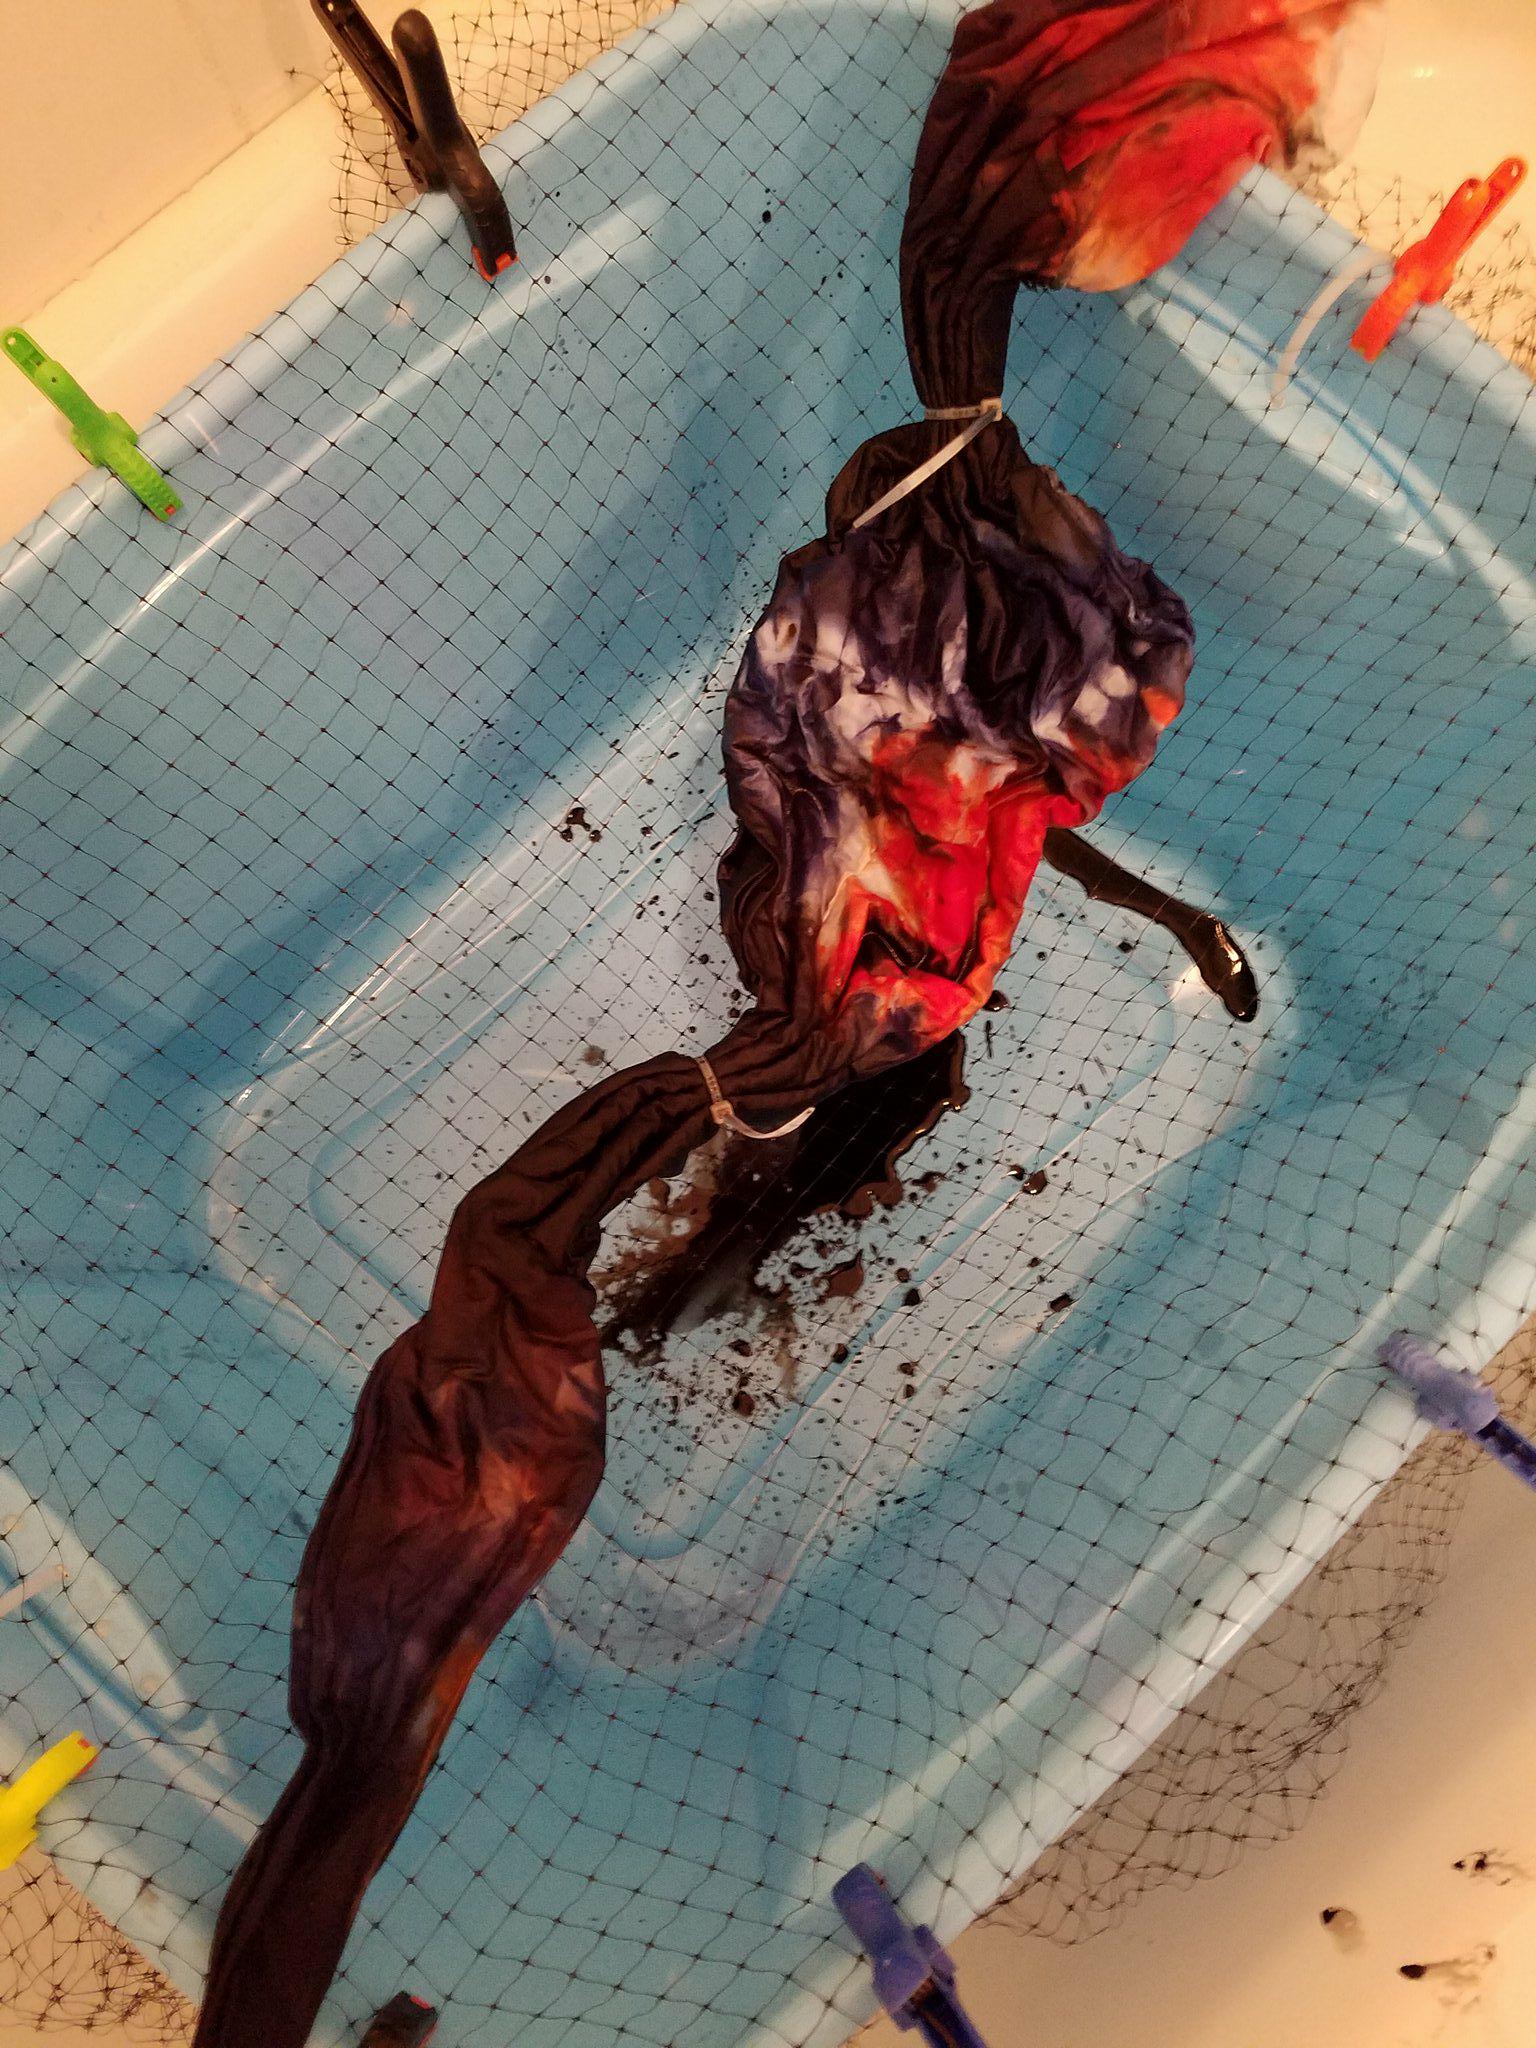
Next, I took the fabric out of the soda ash water, wrung it gently to remove the excess liquid, and placed it in my super fancy dye applying apparatus. Really, the netting keeps the fabric I am dyeing out of the puddle of dye that runs off of the fabric. This is especially useful for ice dyeing, but also works well for this particular version of “normal” dyeing. I applied the black dye over those pesky brown areas. You can put your dye into a mustard/ketchup dispenser type bottle to carefully apply the dye to your fabric, or you can wing it and dump, I mean pour carefully, the dye from the cup or container you mixed it in. Yes, I did pour from the plastic cup. Make sure to turn your fabric over to apply the dye to the opposite side. The liquid dye has trouble getting through all of the folded layers of fabric, especially near the zip ties.
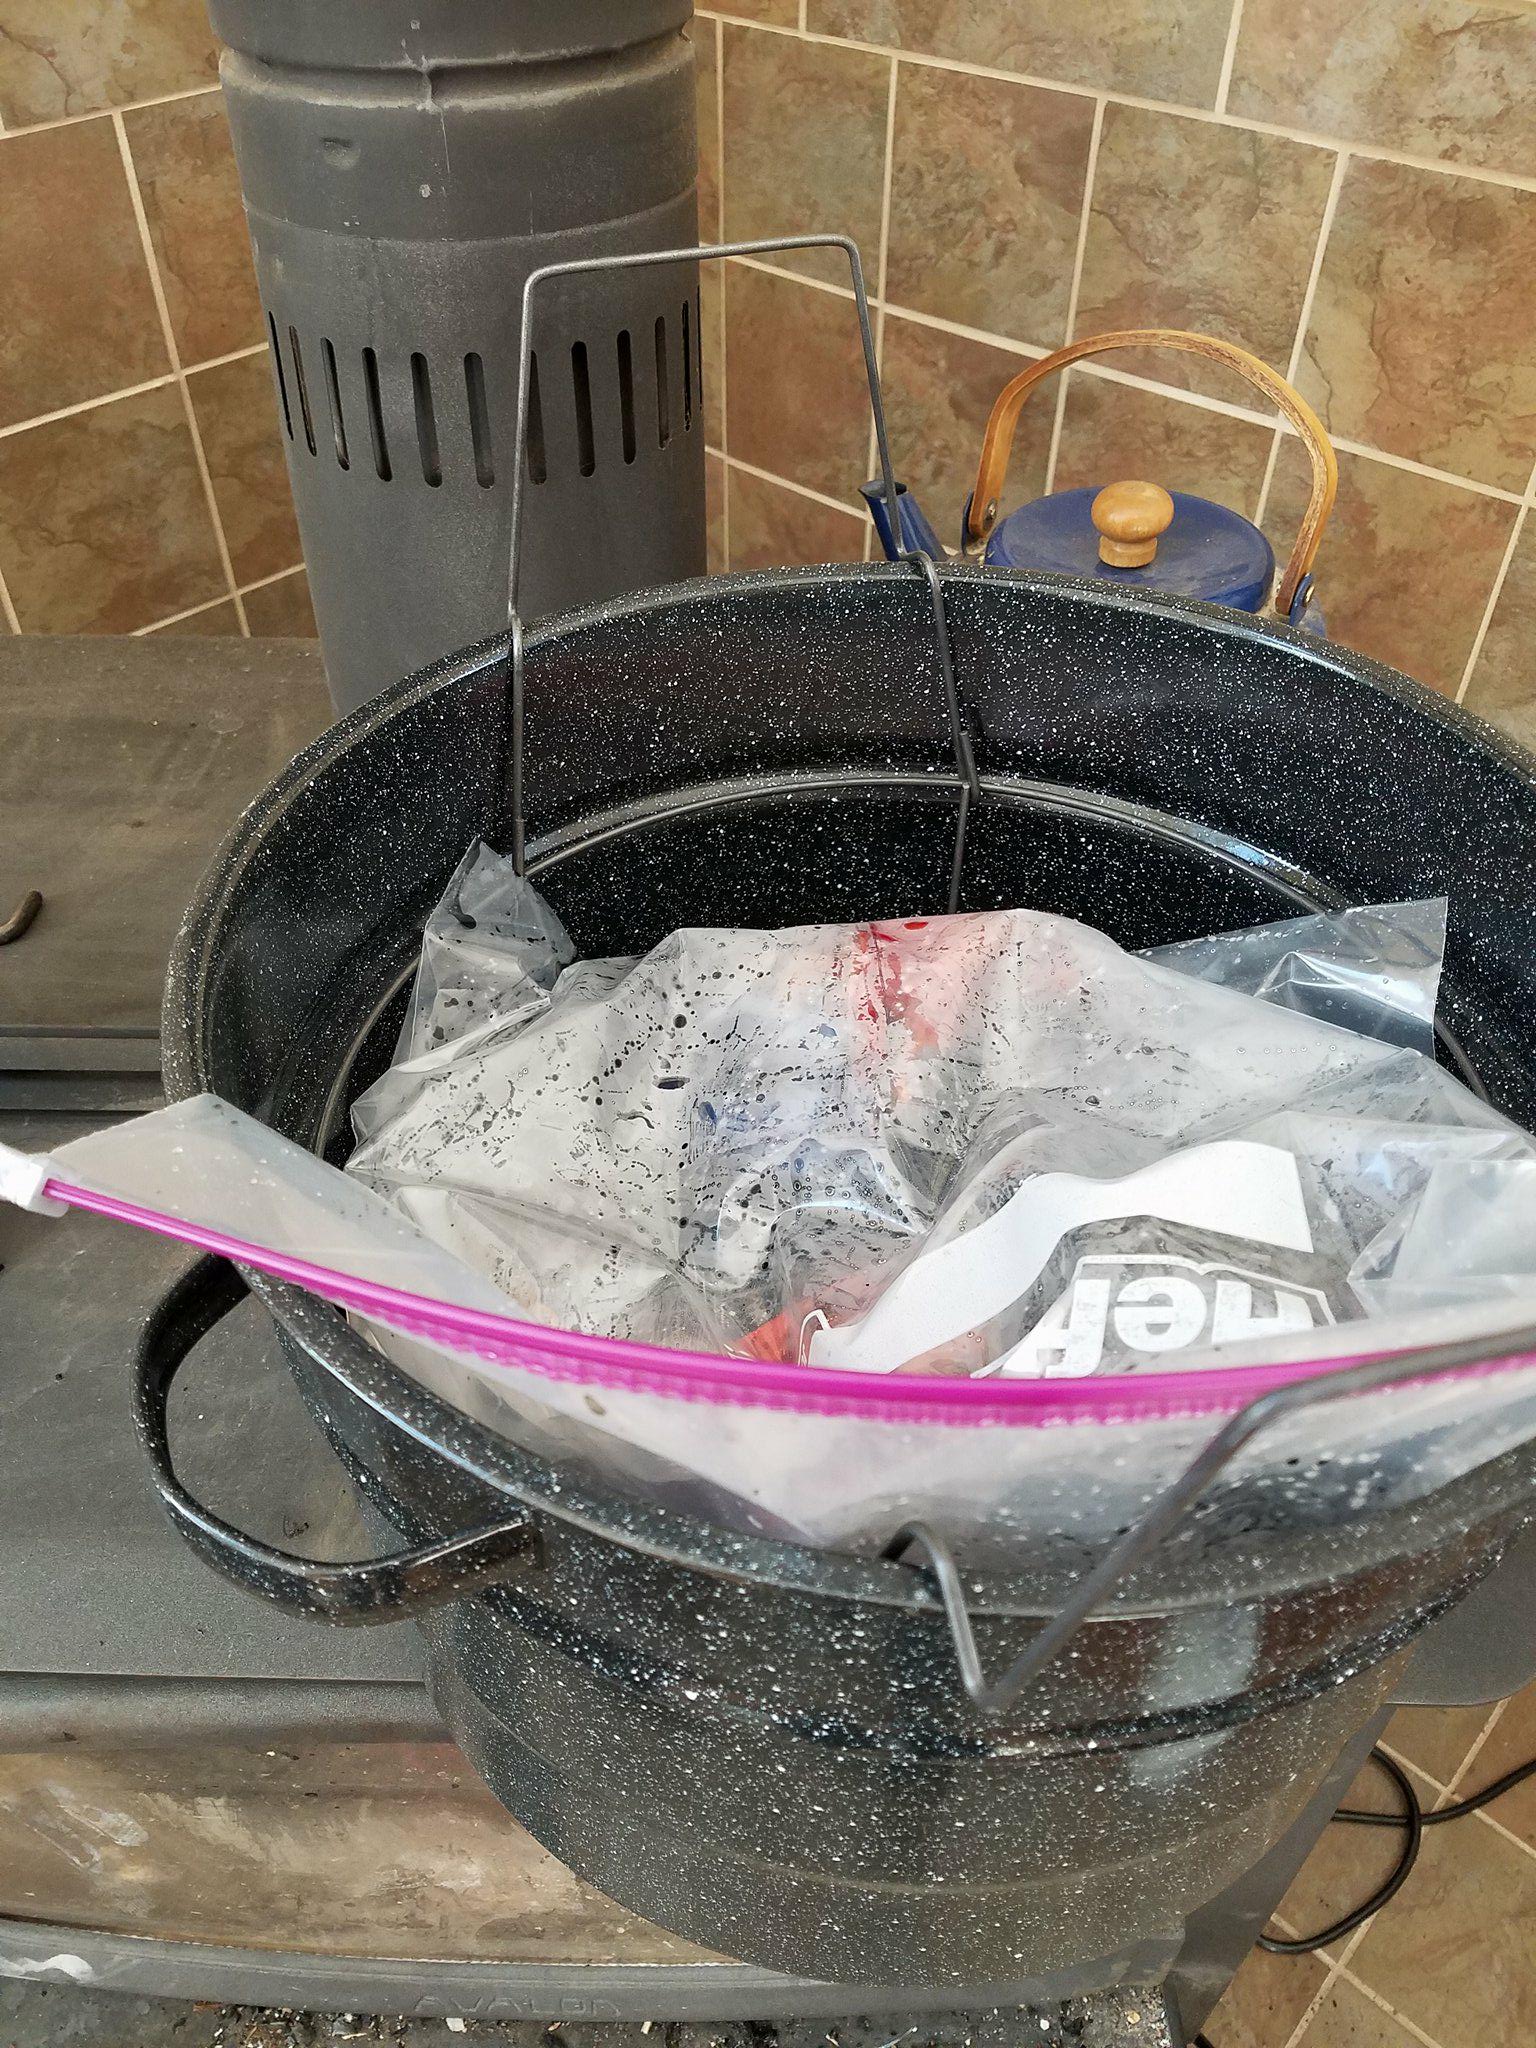
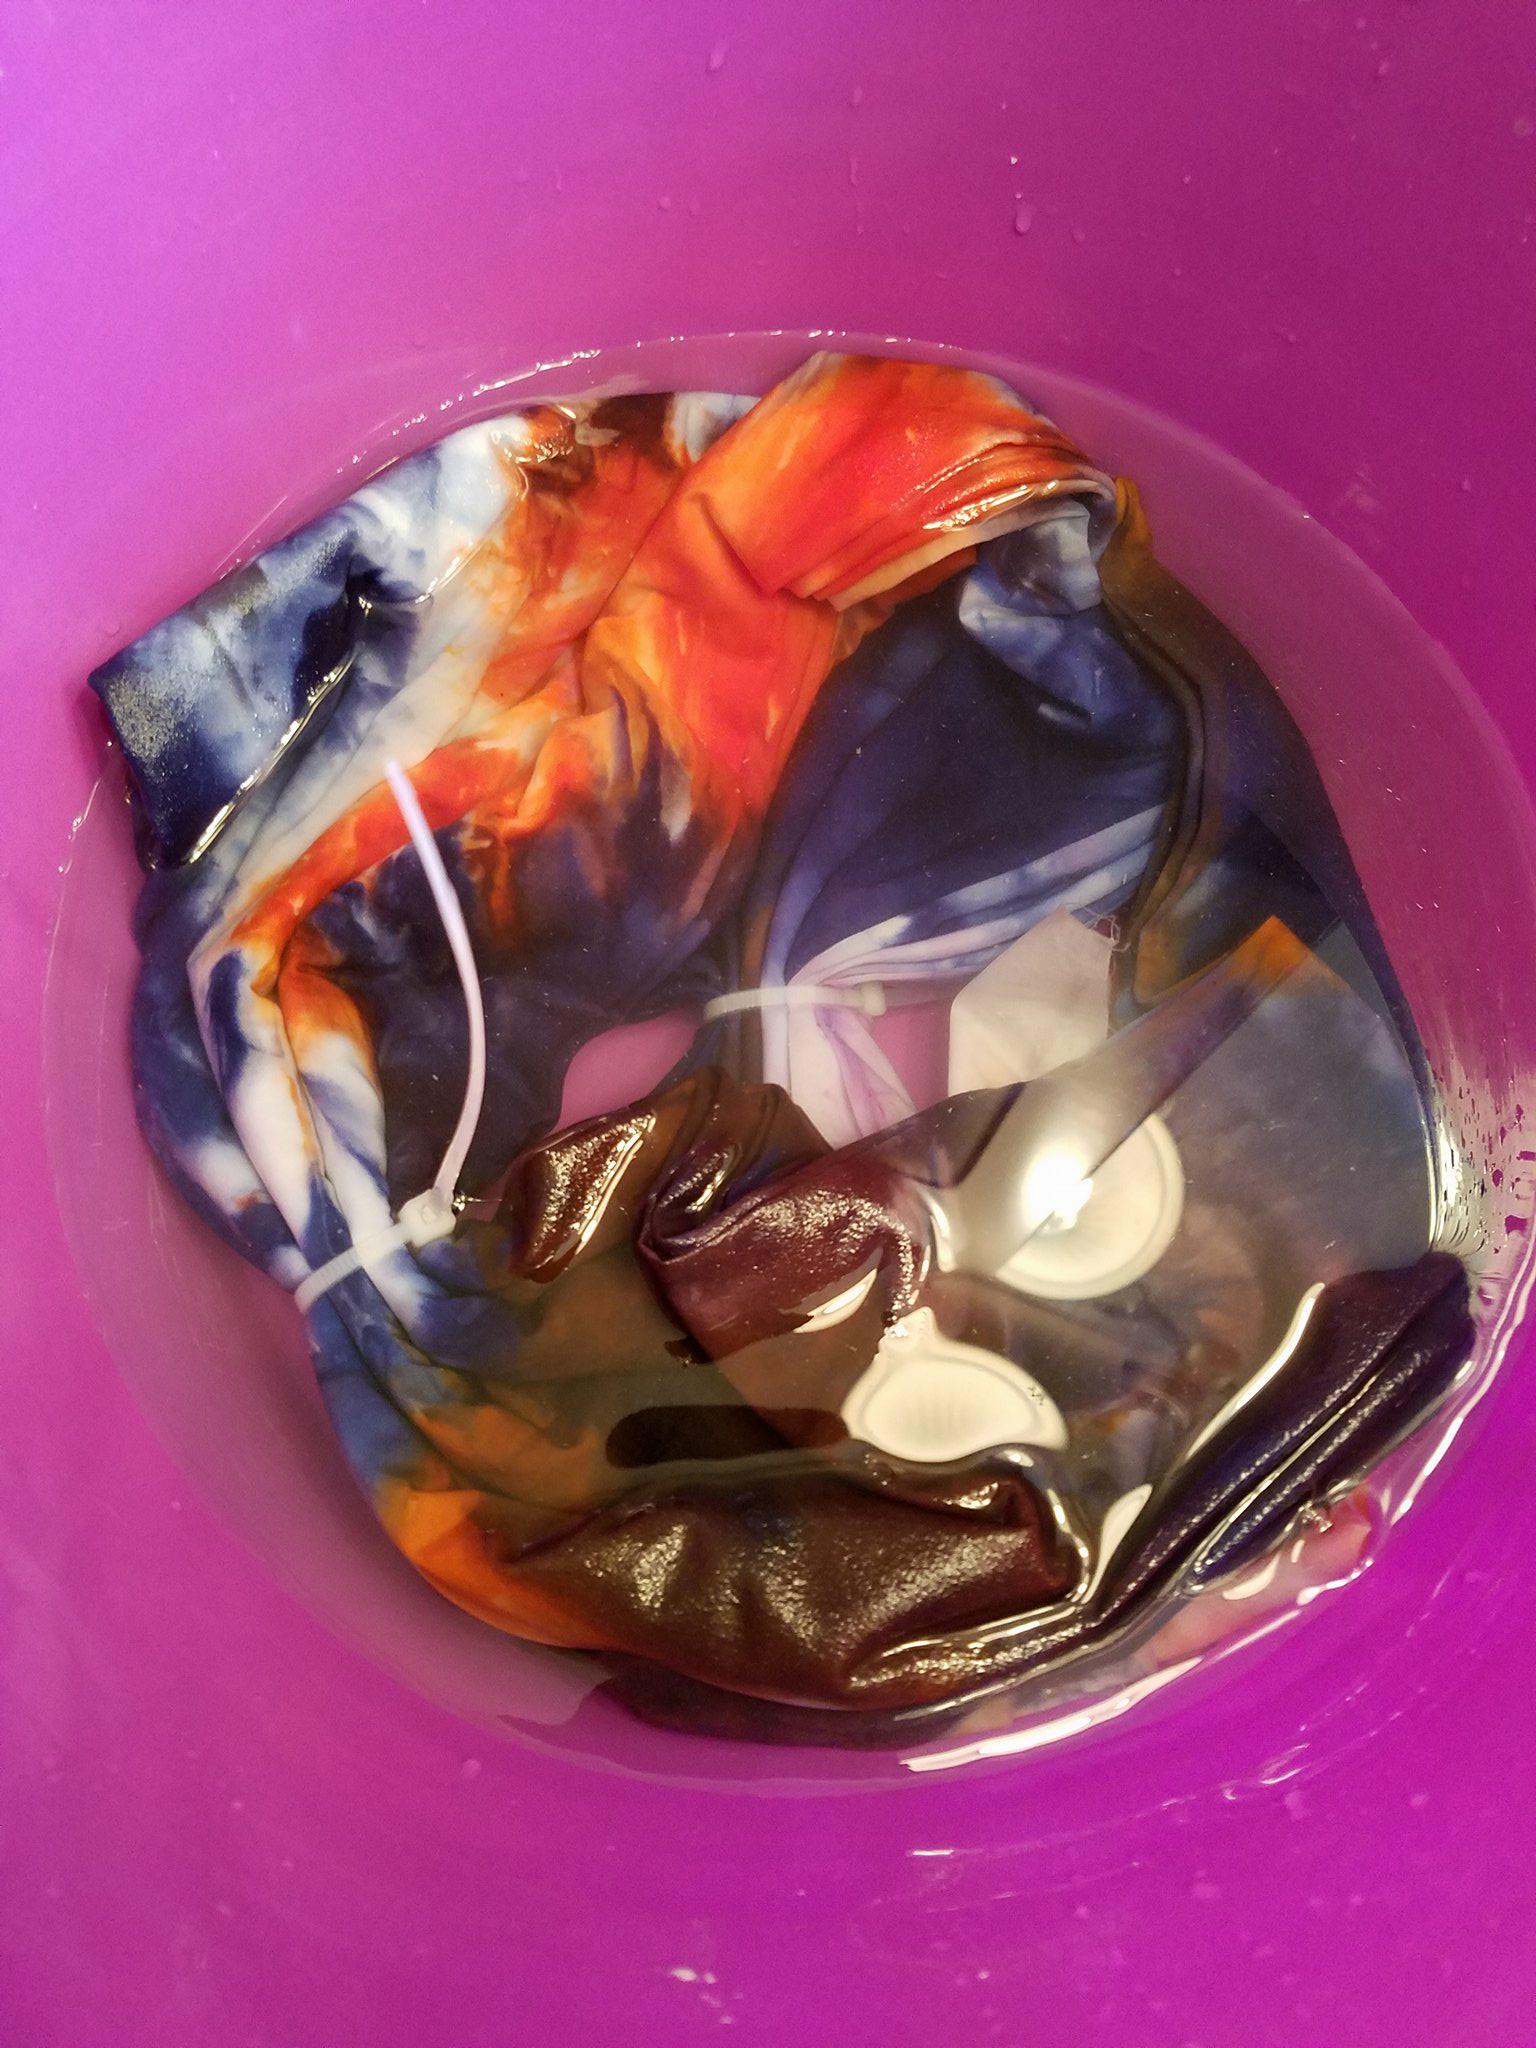
The final step is to batch your creation to let the dye do it’s work. Black dye especially needs to be warm to batch properly. I put my wet, dyed fabric into a large baggie. A really large baggie. I believe it was the 2.5 gallon size. Then I put it on a metal rack in a large crock pot. The metal rack held the baggie off of the bottom of the pot, which is useful since I placed the pot right on top of our wood stove. Okay, the fire had burned out, so it was just very warm. I also put a lid on top to hold the heat in.
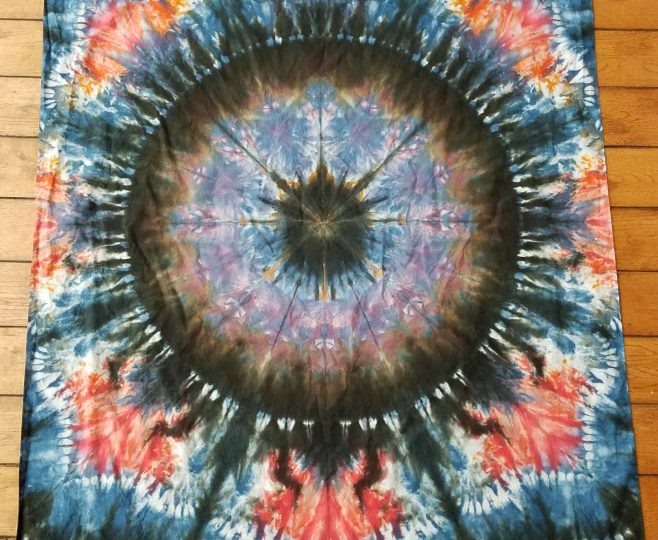
I am very impatient, so I let it batch a whole 1.5 hours. I have left it overnight before. Both times it turned out like I wanted. I took it out of the baggie, and rinsed (cold water, then cut the zip ties and rinse in hot water, then hand wash in hot water with a tiny bit of dawn dish soap, then wash in the washing machine on HOT with a small amount of liquid dawn dish soap as the laundry detergent). Finally, I dried it in the dryer, and ironed it. Here is the result:
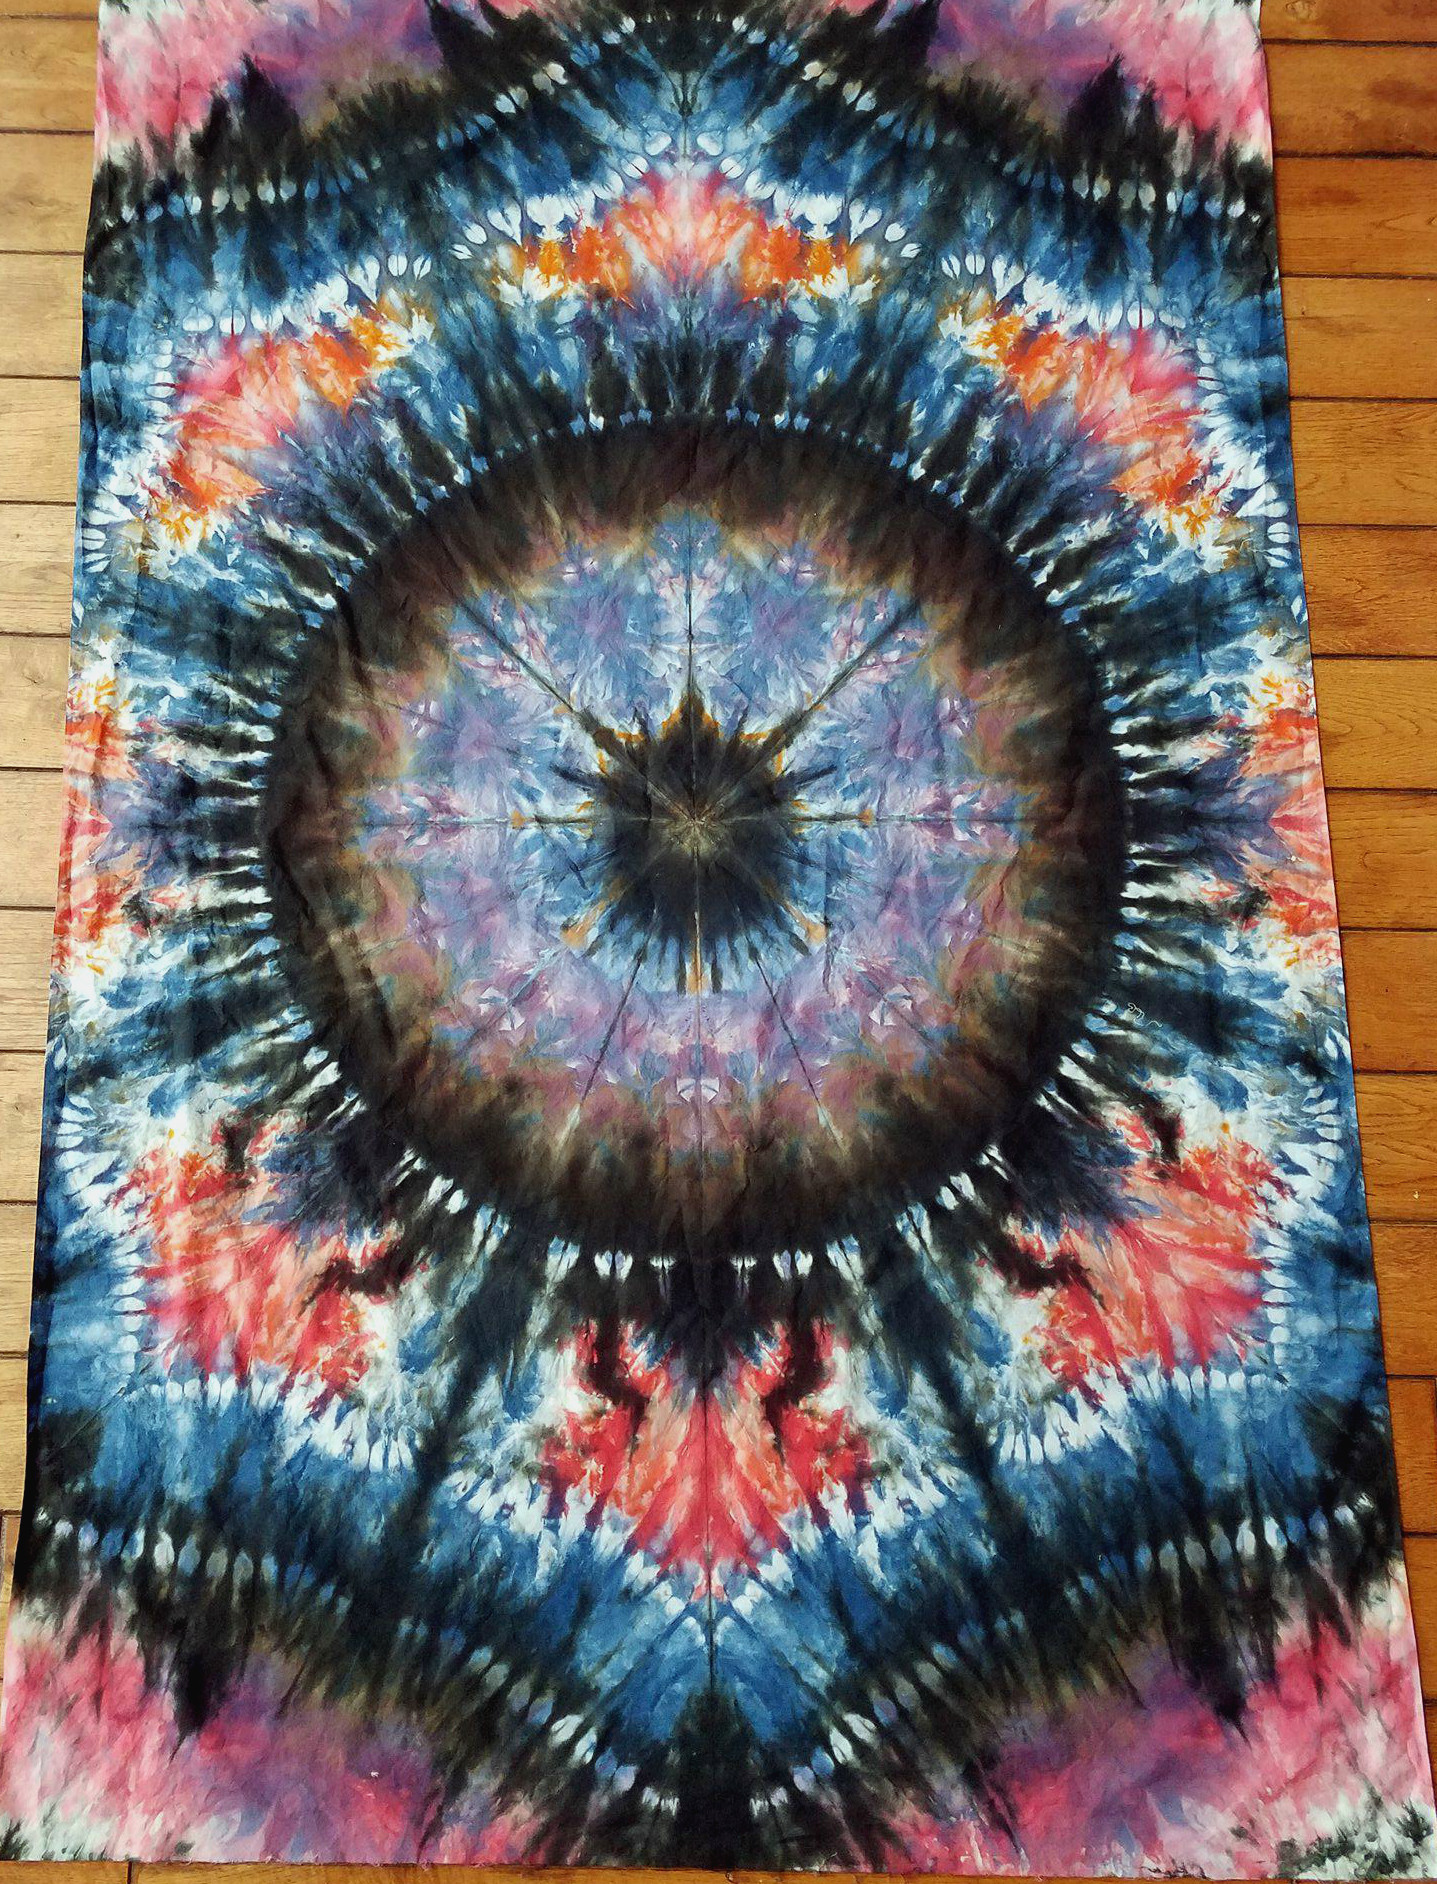
This is much more appealing to me. In fact, I have named it Eclipse. It is approximately 44″ by 66″. Feel free to contact me if interested in a custom dyed piece.